Australian Knife Magazine Articles
Knife restoration
To do or not to do. That is the question!
At some stage we all come across a knife that we feel can do with a bit of a clean. Then arises the question. How far we should take it?
I need to establish one thing very clearly to start with. If you have an old worn, perhaps rusty and maybe a bit battered knife, no matter what you do you cannot restore the knife to new condition. Trying to will only destroy any collecting value that the knife may have. The best you can hope to do is restore the knife to a similar condition to that of a used and cared for knife. Even that may not be achievable.
The first thing to do is establish why you want to clean it and then how far you should go. There are a variety reasons to restore a knife. It may be a family heirloom in poor condition. It may be a collectible knife that you hope to display. The Military knives that I am referencing in particular have often had a hard life. Sometimes it is just better to leave them as they are. If they just show fair wear and tear then that is a testimony to their life. However, some have faced years of neglect since they served and are in need of assistance. The very first thing you should do while trying to work out their future is to give them a good oiling which arrests any rusting and this starts the restoration process.
Time and time again I see old knives that someone has given a quick clean to make them look good so that they can sell them. Usually this is done by putting the knife over a wire brush (motor driven) or a buff. While this removes some of the rust and patina it also rounds corners and edges and may obliterate any of the remaining makers marks which can be quite faint on some of the very old knives.
My approach to knife restoration and cleaning is a minimalist one. It is better to do nothing than make an awful mistake.
That being said I do from time to time effect some gentle restoration to some of my knives. I use the words ”gentle” and “soft” when discussing knife restoration with other collectors. I do not like to use anything hard and abrasive on my collectible knives. If I ever need to use a wire brush (hand held) I only use a brass wire brush. Brass being softer than steel will not mark it. I also use nylon brushes and even tooth brushes.
 Brass wire brush.
Be careful: Not all brushes marked as Brass Wire Brushes have brass bristles. Often these are Brass Coated Steel and they will damage any knife you try to clean with them. If in doubt, test with a magnet. A magnet will not stick to brass.
RUSTThe biggest nemesis of our Military heritage is rust. All of the blade ware up to WW2 was Carbon Steel. Stainless Steel did not start to make inroads until the end of the war. Sometimes the old warriors we obtain can be badly affected by rust.
Rust can be removed by several methods.
- Wire brushing which is destructive and should never be considered on collectable knives.
- Acid Bath using mild acids such as Citric Acid or Vinegar. Sometimes even mild Hydrochloric acid. Effective but has its dangers.
- Soaking in a Molasses solution. This is slow and messy.
- Rust removal chemicals. There are some propriety chemicals on the market that are claimed to be non toxic. Effective but expensive.
- Electrolysis. Inexpensive and quick.
I use the Electrolysis method.
Simply explained the rusted item is suspended in an electrolyte. The negative lead from a battery charger is attached to the rusted item and it becomes the negative electrode. A positive electrode is also immersed in the electrolyte. A current is then run through the system. Hydrogen gas bubbles off the negative electrode and the current flow causes the rust to soften. The rusted item can then be removed from the vat to be hosed down or brushed down if need be. It is common for a black oxide to remain on the item. Some items such as tools look quite attractive with this black coating. This is generally not so on blade ware and this is where the brass brush is needed.
You need a container to hold an electrolyte. If you have a plastic one you will need to provide a positive electrode such as a rod or metal mesh.
I made my vat up with an unserviceable stainless steel urn. I removed all of the electrical fittings and the lead from it. This is ideal for small items such as clasp knives which can be completely immersed.
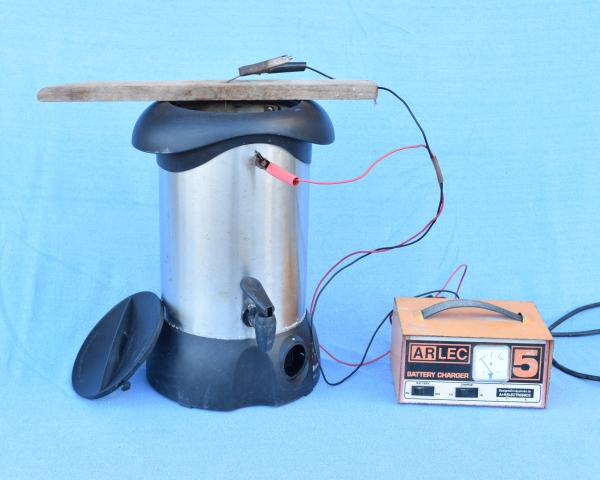 My small Vat.
6/12 volt battery charger is the power source.
Washing soda added to the water is my electrolyte. 10 grams/litre
The knife is suspended in the vat on a piece of heavy copper wire on a piece of wood
The copper wire is attached to the negative lead.
The positive lead is attached to the vat body and the whole body becomes the electrode.
If I need to de rust larger items I have a large plastic tub with weld mesh around the inside as the electrode available to me.
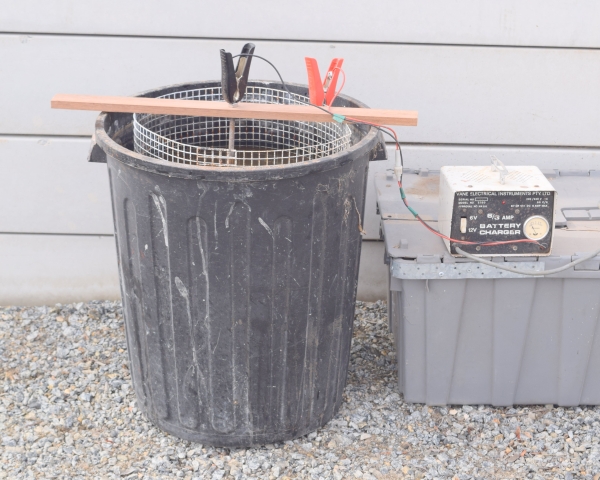 My large vat.
 My large vat.
There are a couple of warnings needed here.
If you use a Stainless steel receptacle for your vat, be aware that the electrolytic process can cause the chromium in the Stainless Steel to leach in to the Electrolyte. This will make it TOXIC. You should not put your bare hands in the electrolyte and should always wear rubber gloves.
The process causes Hydrogen to be given off at the negative electrode. Do not operate in enclosed spaces where the Hydrogen could build up. It could cause an explosion. Always use in a well ventilated area.
The process does not usually take much longer than half an hour.
Hydrogen embrittlement might be an issue if you leave the process on for a prolonged period. The hydrogen can get absorbed in the steel. If you are concerned, baking the tool in the oven for an hour or so at about 150°C (300° F) should remove absorbed hydrogen without affecting the temper. Passage of time is also known to result in the loss of hydrogen from steel.
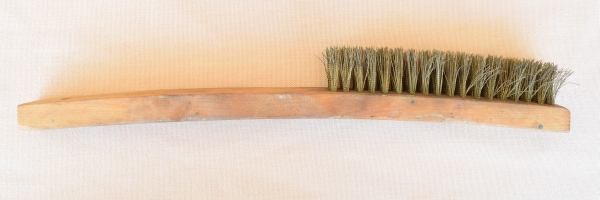
 Knife cleaned up badly on a wire wheel.
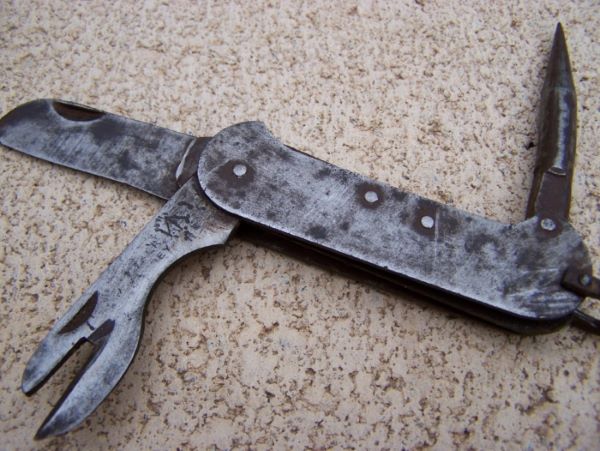
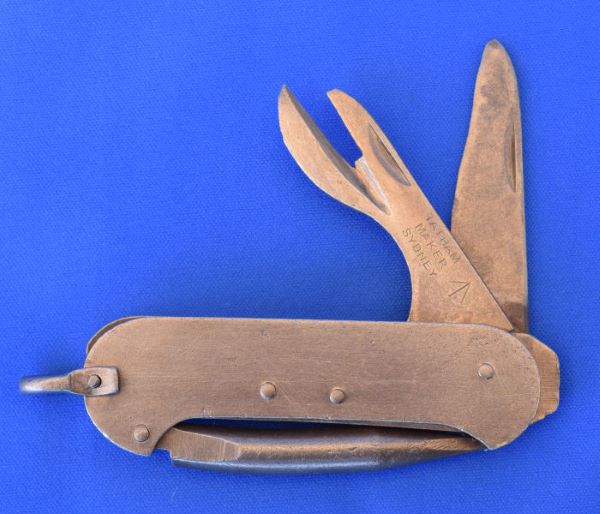
Before treatment this knife shows obvious surface rust. Not much of a display piece!
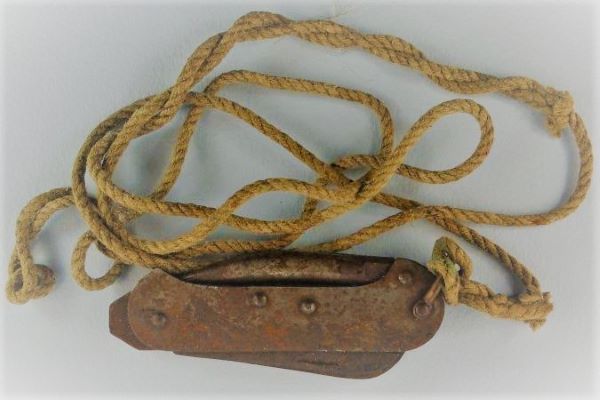
The lanyard was removed and washed with detergent by hand. After treatment the knife was scrubbed down with a brass wire brush.
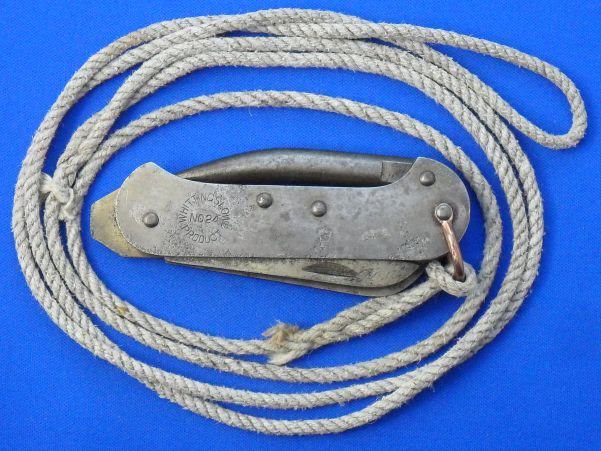
The knife was then oiled and waxed. It is now suitable for any collection! Has far more character than a knife that has been put on the buff!
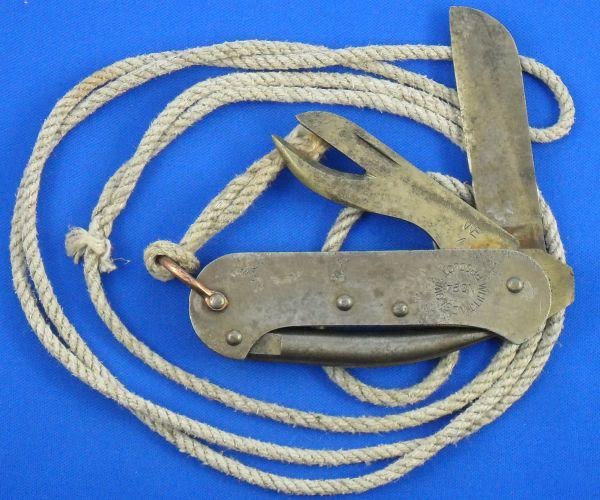
Another before and after!
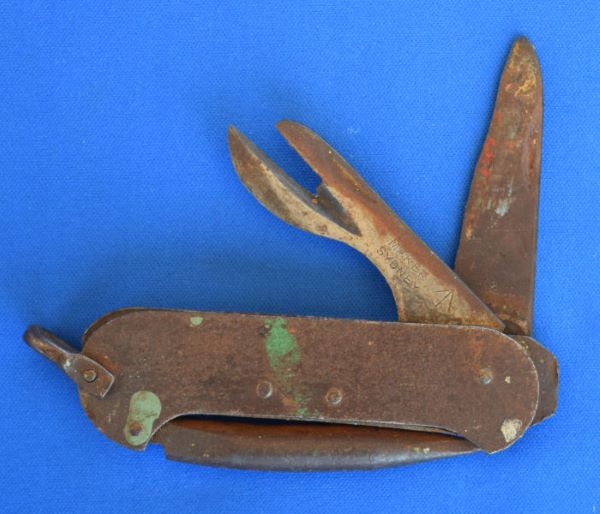 Before
 After
After
This information was featured in the Australian Knife Magazine, Issue 4 Feb - June 2018 in the Military Collector column.